Fortunately, the new place is less than a mile away. This means that I get to move bottles two different ways. One is quick and easy (but prone to spillage) and the other harkens back to my days as a risk-averse museum curator. It was in museums that I learned that something like 85% of damage occurs to objects while they’re in transit; you’ve got to guard against it carefully.
 |
| Getting ready for the move |
You can move a lot of liquor in a short time with this method but, unpadded, the bottles may break. If the crates tip or go sideways for any reason — a sudden stop, for instance — they may spill or leak contents, either because corks and screwcaps aren’t secured or because they’re defective. Old corks in particular may not provide the seal they seem to at a glance.
You could reuse empty liquor boxes from your local liquor store or friendly bartender the same way. The cardboard dividers add some protection against breaks — but liquids in transit, especially in partially-filled containers, like to slosh around, so there’s still the leakage issue.
That’s where Teflon or plumbers' tape comes in handy. Plumbers' tape is readily available at hardware stores and plumbing supply firms. We call it tape, but it’s really a thin film of polytetrafluoroethylene (PTFE) that doesn't have a sticky side like duct or masking tapes. It’s used in joints on plumbing projects to prevent leaks. Although it sticks to itself, it doesn’t stick to other surfaces — and that makes it ideal for sealing bottles.
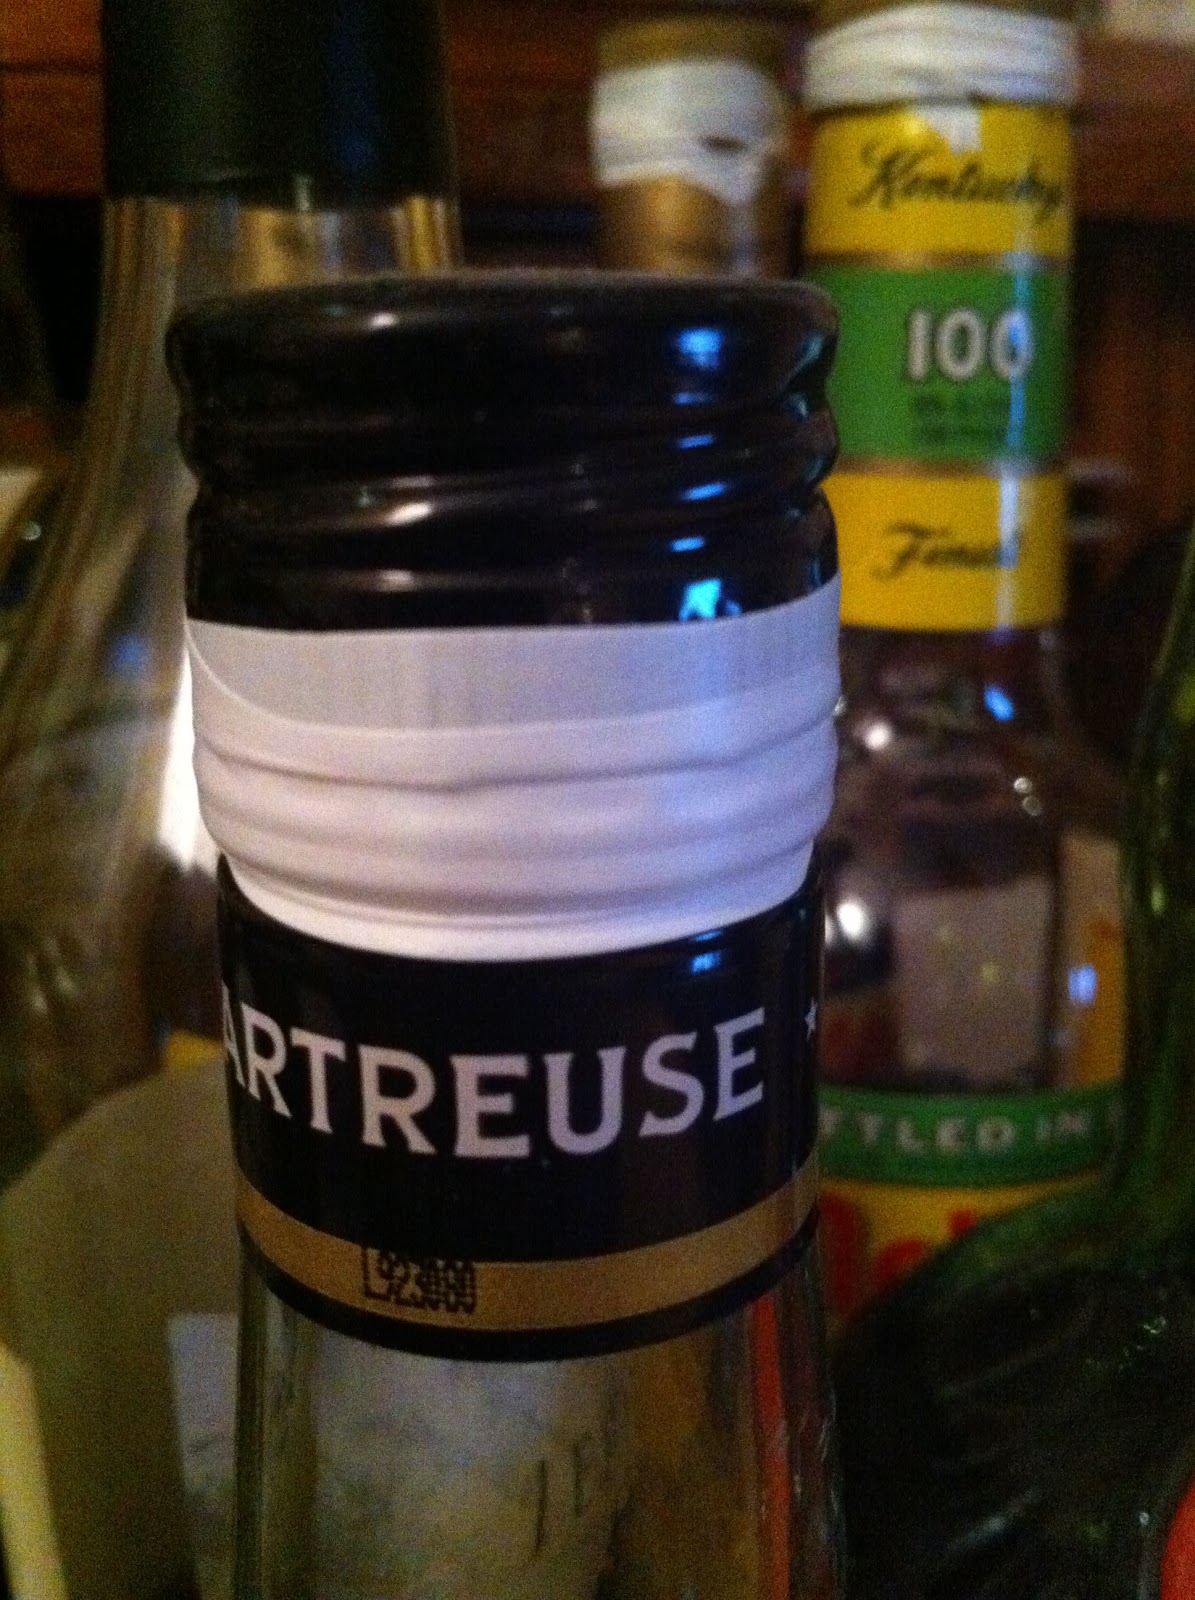 |
| Sealed with plumbers' tape |
I’ll risk a great many things. But not when I don’t have to. I’m padding all the bottles, of course, but just as importantly, Teflon tape goes on each and every open bottle the movers are taking.
Overkill? Maybe. But as Vincent Vega can tell you, bad things sometimes happen in vehicles and a roll of tape costs less than a Royale with Cheese. Losing a single bottle seems unlikely, but it was a leaky bottle that caused this mess. A leaking bottle may dampen cardboard, causing it to rip. A ripped box could mean a few hundred dollars worth of liquor — some of it no longer produced — comes crashing to the sidewalk when a mover lifts it.
And that ain't gonna happen.
How to apply plumbers’ tape to a liquor bottle
Keep the bottle upright (liquor bottles should be stored upright, anyway). Make sure the cork or screwcap is sound, dry, and snugly in place. Pulling gently to stretch it just a bit, wrap the tape 2-4 times around the joint of the bottle’s cap and the glass neck or the lower part of a screwcap. Repeat as necessary on the remaining bottles.
To remove, simply peel it off carefully. Because the tape only adheres to itself, it’s unlikely to take off any ink, paper, or decorative embellishments.
2 comments:
Great tip!
Please link back to this post when we are about to fly to Nola next year!
:)
I just put a reminder on my calendar, Tony. Steve Williams (@absinthegeek on Twitter) also suggests using silicon tape the same way.
Post a Comment